

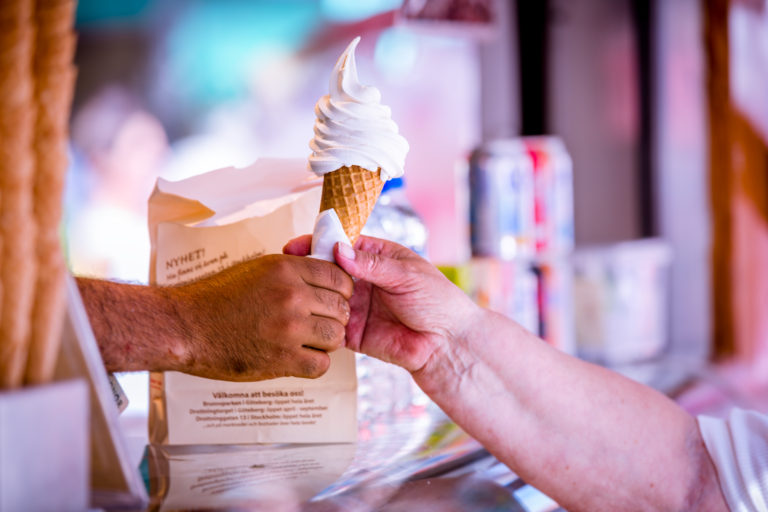
My Humble Beginnings in Paradise
June 9th, 2019 by Neil Williams
My Humble Beginnings in Paradise

The year was 1988. I was in Florida at the time, working for Multi-Vest Options in Ft. Lauderdale, shortly after graduating from Florida State. The phone rang and my older brother John said…..”Neil, I bought an ice cream delivery truck and just shipped it to St. Thomas. I need help. I’ll pay you $250 a week and give you a share of the business.”
At the time, I was clearing about $175 a week, so it didn’t take long for me to quickly blurt out, “I’m in!” A little history…. We grew up in Puerto Rico. Our father moved there from Chicago in the sixties and started a successful direct marketing business. John did a few years in different stateside colleges but did not graduate. Instead, he took flying lessons and got his pilot’s license. He started a distribution business where he would fly fresh produce from Puerto Rico to the US Virgin Islands, The British Virgin Islands and further down the Lesser Antilles. My brother was obsessed with perfection and delivering the perfect product. I remember helping him one summer while I was still in college. We were sorting through cases of apples preparing to fly them to St. Lucia. John made me go through each and every apple in each and every case and remove the bad ones and replace them with good ones. I asked him why he was so worried about an apple having a bruise, especially if it was in the middle of the case. Who would know? He said that the best way to grow your business is to deliver a better than expected product and delight your customer each and every time. “Over deliver Neil, and they will keep calling you back”
All I could think of at the time was, my back hurts….when do we pack up and hit the beach? Needless to say, word got around fast and more and more customers wanted to buy product from that guy that flies in from Puerto Rico. The business flourished. But John only had one plane, and he could only carry so much produce. He started looking for a higher profit product. No, not “that”– although drugs were exactly what was going through each and every customs agent John had to face. They found it hard to believe that John was actually trying to build a business around flying produce. As crazy as it seems, he was doing exactly that.
Enter ice cream, a much more profitable product than produce!
John noticed that the ice cream on the supermarket shelves and ice cream parlors in these islands was almost always re-frozen. Horrible quality, at a high price. People accepted it and figured that this was the way ice cream was. Icy, grainy, sandy. He saw an opportunity and ran with it. He developed a system of double corrugated cardboard boxes lined with polystyrene (like the inside of your basic foam cooler). While inside the walk in freezer of the ice cream distributor in Puerto Rico, John packed and sealed the boxes to ensure that the tubs and pints remained rock solid. The flight was about an hour long, and John could get about 5 hours out of these boxes before the ice cream began to suffer. The 5 hours would give just enough time to get to the last account and deliver perfect product. Once done in the walk in freezer, he would pack the boxes in his van, head for the airport and take off for that day’s island. Upon landing, he would quickly rent a pick up truck, clear customs, load up the boxes and head out to sell his accounts, who had pre-ordered the product. I’m not making this up…..although it seems hard to believe that anyone would try to build a business around this concept. Once John tired of the constant every day rush to avoid “meltdown” he realized that he needed to buy a truck. That is when I got the call and moved to St. Thomas, the island with the most promise.

John continued to fly the product in, but we decided to concentrate on building the business on St. Thomas. The picture at the start of this post is of the two of us, John by the plane and me loading Haagen-Dazs bars into the truck. John would fly back to PR, and I would calmly go out and make deliveries. About a year later, my brother Michael joined the business. We bought another truck and Michael moved to St. Croix, to develop that market. I remember how John would always set goals and break-even points around the number of boxes we could sell in a given week. He would say things like, “when we get to 90 boxes a week, we’ll be making some decent money…..so we need to open some more accounts to get there”. All I can remember was thinking, boxes? Boxes? We need to start thinking in dollars and another way to grow this business. It didn’t take long for John to start thinking in the same terms. At this point, we were starting to move enough product to start buying it in Florida and shipping frozen containers down to the islands.
We built walk in freezers on both St. Thomas and St. Croix. Our suppliers (Haagen-Dazs and Dreyer’s/Edy’s) were very happy with our performance and John was given the rights to distribute the Dreyer’s/Edy’s line for “the big island” – Puerto Rico. He later added Ben & Jerry’s to the mix. By 1998, we had built a business with over 15 route trucks in Puerto Rico, St. Thomas and St. Croix. John and Michael are still actively managing the business today. In 2001, I started to get “island fever” and decided to move my family (wife Amy and two girls, Chelsea and Coco) to North Carolina where I began to develop TurnKeyParlor.com.
I still talk with my brothers on a regular basis and frequently bore others with our constant ice cream business conversations. So, the moral is….I’m really not sure……. No, all kidding aside, the moral is….. work hard, “over deliver” on your promises and good things will come your way. The goal at TurnkeyParlor.com is to offer the “best apples” possible to my customers on a daily basis. So far, this approach has helped me build a really solid, rapidly growing business. TurnKeyParlor.com is visited by thousands of prospects a month, many who turn into long term customers. If you have a story you would like to tell, or would like to comment on my story, please do so. Thanks for reading this post.
Neil Williams, President of Keyword Farms LLC
www.TurnKeyParlor.com
877-817-5716
equipment@turnkeyparlor.com
Make Your Own Ice Cream or Buy 3 Gallon Containers from a Distributor?
January 17th, 2011 by Neil Williams
 What’s the better option, making your own ice cream or buying and reselling 3 gallon tubs of a recognized brand? Truthfully, there is no right answer. Both could be great options. This post will simply to outline reasons why you would go in one direction vs. the other depending on your specific situation and your specific goals.
This question is frequently debated and asked by almost everyone planning to enter the ice cream store business. In my opinion, it depends on many factors. I encourage those of you who make your own or buy a national brand in 3 gallon cans to post what led you to your specific strategy.
I’ll start with the benefits of buying a national or strong regional ice cream brand that is pre-packaged in 3 or 2.5 gallon round tubs:
What’s the better option, making your own ice cream or buying and reselling 3 gallon tubs of a recognized brand? Truthfully, there is no right answer. Both could be great options. This post will simply to outline reasons why you would go in one direction vs. the other depending on your specific situation and your specific goals.
This question is frequently debated and asked by almost everyone planning to enter the ice cream store business. In my opinion, it depends on many factors. I encourage those of you who make your own or buy a national brand in 3 gallon cans to post what led you to your specific strategy.
I’ll start with the benefits of buying a national or strong regional ice cream brand that is pre-packaged in 3 or 2.5 gallon round tubs:
- People like to buy what they are familiar with
- Initial investment is lower – you only have to buy dipping cabinets and storage cabinets vs. a batch freezer, hardening cabinet, dipping cabinets, etc.
- Less machinery means less utilities expense
- Product consistency – making your own can also be consistent if you are the only one doing it, but once you have employees start making ice cream too, it can get tricky to maintain that consistency
- Simplicity – no manufacturing labor – you buy 3 gallon tubs from an ice cream distributor, you drop them in the dipping cabinet and scoop away
- Cost – normal markup on ice cream you purchase from a distributor allows you to make around 70% gross profit when charging what the market will bear. In other words, if you charge $2 for a scoop, your cost is about $.60 for that scoop. When you make your own, the materials cost is much lower. That $2 scoop should cost you more like $.30-$.40. If you make Italian Ices, your cost is even less
- Exclusivity – Only YOU can sell your ice cream. Customers can buy national brands in many parlors and can also pick them up at the local grocery store
- Variety – With an Emery-Thompson Batch Freezer, you can make not only ice cream, but you can also make your own Italian Ice and Gelato.
- Homemade – People love homemade ice cream. Customers like the idea that the ice cream is made fresh and with a local twist to it. Customers like to see and know the owner of the business
- Creativity – You can invent new flavors. You can make changes to the product suit your region’s tastes. You can hold contests for new flavors using social media tools. The options are limitless
- CLICK HERE FOR INFO ON BUYING PLASTIC ICE CREAM CONTAINERS
How to Choose The Right Soft Serve Ice Cream Machine for your business
November 7th, 2020 by TurnKeyParlor.com
|
|
|

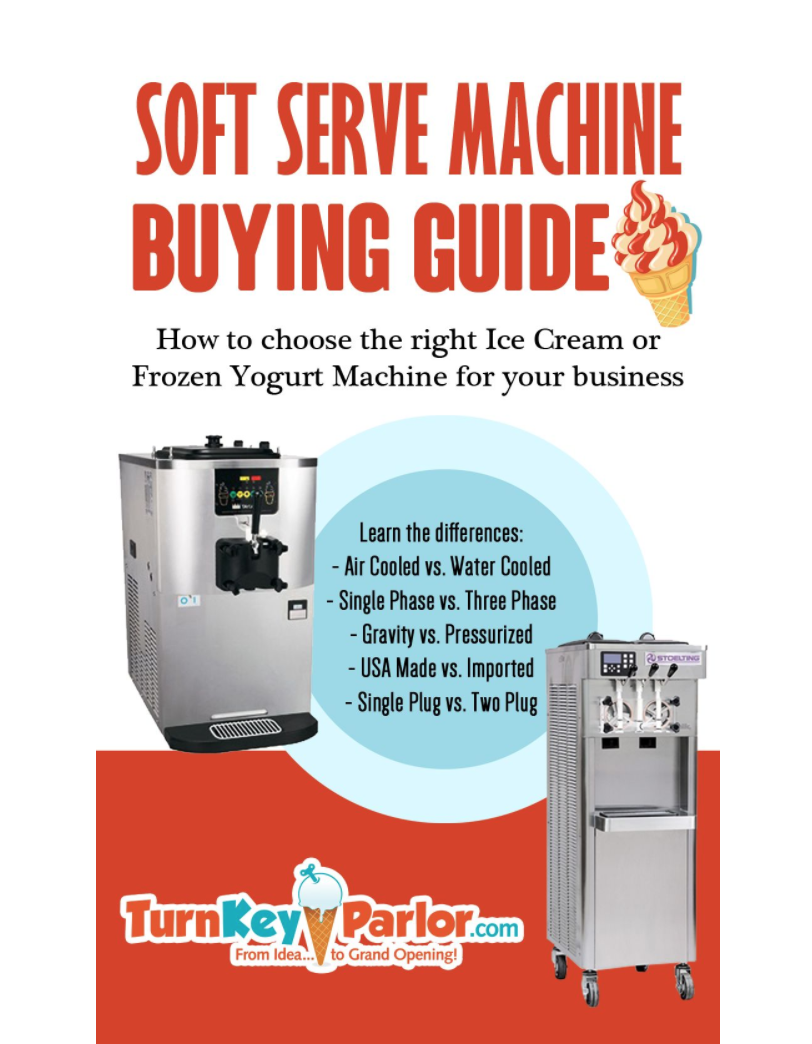
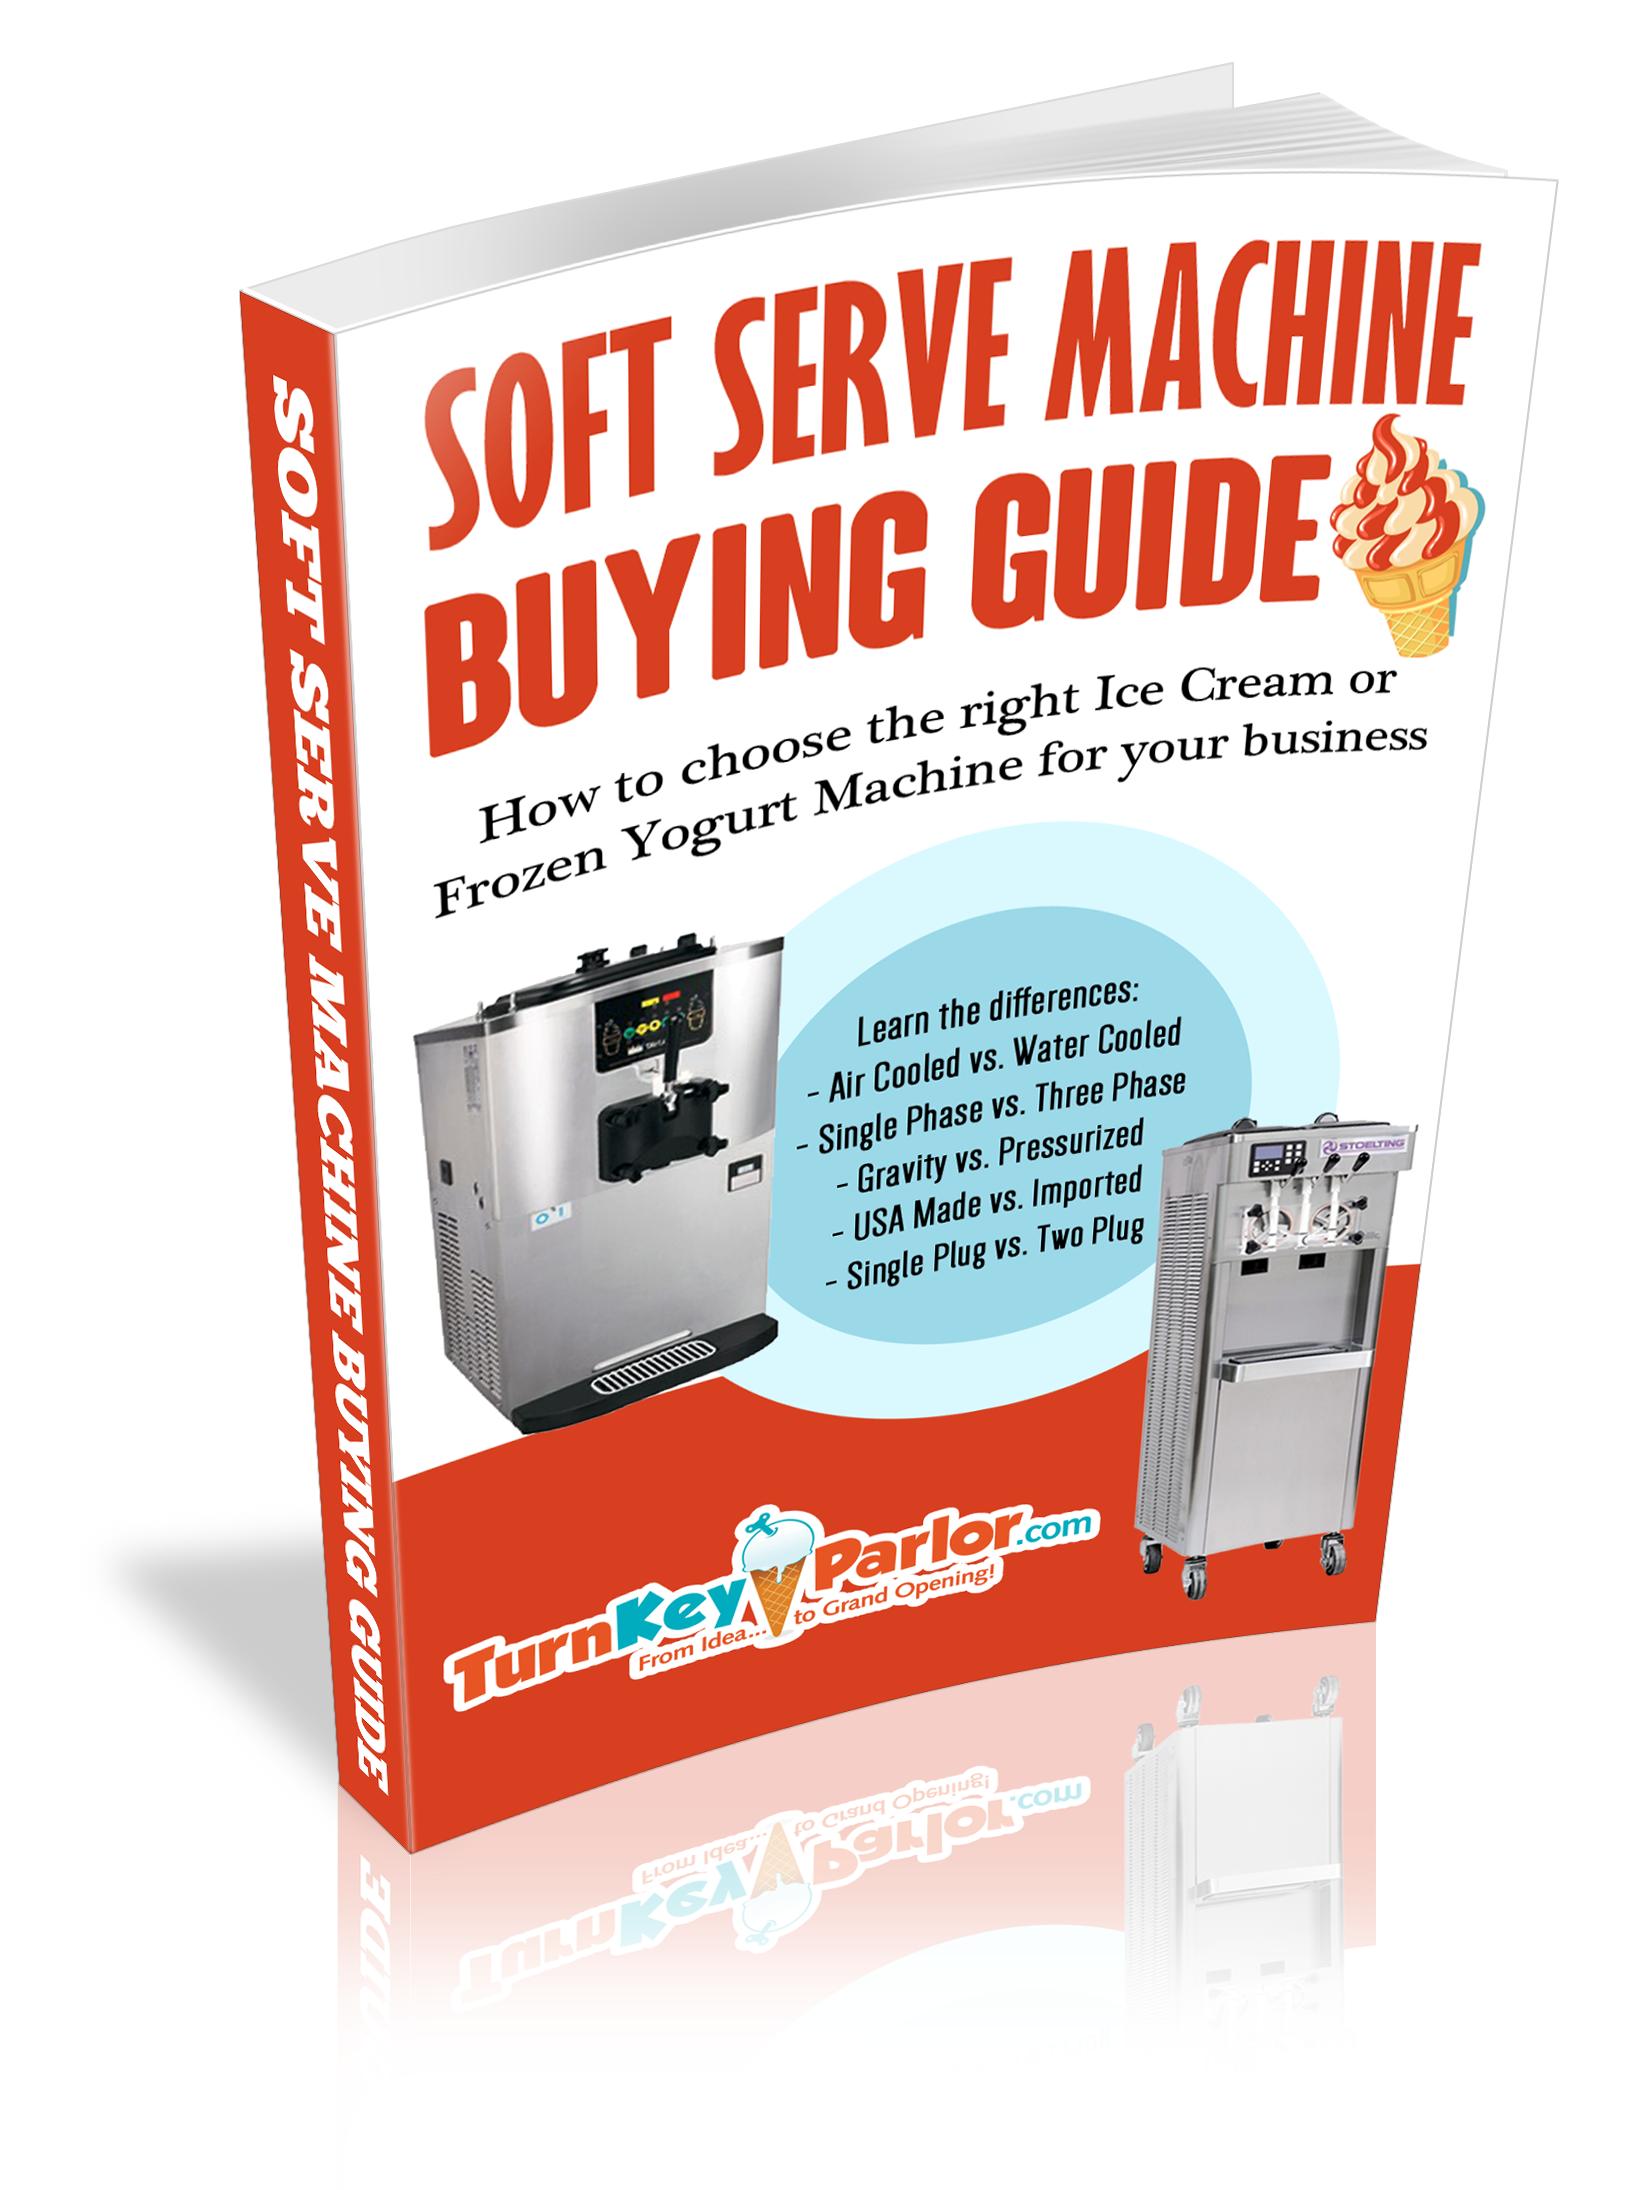
Soft Serve Frozen Yogurt & Ice Cream Machine: A Buyer’s Guide
Starting a soft serve ice cream or frozen yogurt business and don’t know where to start? We can help. Find out what soft serve machines will be the best for your customers in this snippet of our Soft Serve Buyer’s Guide:
Here at TurnKey Parlor we know that starting a soft serve ice cream or frozen yogurt business is a lot more complicated than eating ice cream and frozen yogurt. We pride ourselves in helping our customers with the process of bringing their business from an idea to their grand opening! We have decades of experience in the frozen dessert industry and never hesitate to share the ins & outs with our customers so they can achieve maximum success in their business. We have put together a FREE Soft Serve Machine Buying Guide for you weigh your options and make the best decisions on what equipment you’re going to need to make your dreams a reality.
What machine is right for me?
Choosing the right machine is a fairly complicated process, but we will try to simplify it by reviewing the things you need to take into consideration. Learn the differences between:
- Air Cooled vs. Water Cooled
- Single Phase vs. Three Phase
- Gravity vs. Pressurized
- USA Made vs. Imported
- Single Plus vs. Two Plug
Choosing the best ice cream or frozen yogurt machine for your business does not need to be a guessing game!
For a more in depth analysis of all things related to soft serve ice cream machines, check out our this newest and more up to date article!
You can Download the Soft Serve Machine Buying Guide HERE or click the photo below!
3 used taylor model c723 made in 2013 plus equipment $22,900
November 24th, 2019 by Neil Williams
3 used taylor model c723 machine package deal with equipment $22,900 CLICK HERE TO SEE DETAILSNelson Dipping Cabinets – BD16DIP, BD12DIP, BD8DIP, BD6DIP,BD4DIP,HV
November 9th, 2018 by Neil Williams
Operating Condition for Nelson Model 12DIP. 16DIP, 12DIP-HV, 16DIP-HV

Nelson BD16DIP
1 ) TO CHANGE TEMPERATURE SETTING Press the “SET” key to display the current temperature set point, which will flash, then release the set key. Use the UP & DOWN arrow keys to adjust to the new temperature set point. Press and release the “SET” key to lock in the new temperature setting. After about 10-15 seconds, the temperature control will display the current temperature.
2 ) INSTALLATION GUIDELINES
The Nelson visual display ice cream cabinets require a store temperature of 75 degrees (F) and 55% RH.1. The cabinets need to be installed with regard to moving air currents such as fans, air conditioning vents, or open doors. Moving air around the cabinet will cause excessive frost buildup and may prevent the cabinet from achieving proper temperatures. 2. The display cabinets must be located away from windows that would allow direct sunlight into the cabinet. 3. The Nelson 12DIP-HV and 16DIP-HV require the compressor vents to be free and open on both the operator side(air intake) and the customer side (air exhaust). BLOCKING THE CUSTOMER COMPRESSOR VENT WILL CA– USE THE COMPRESSOR TO OVERHEAT AND CA– USE POOR PERFORMANCE. 4. The cabinets must be cleaned regularly to keep frost build-up to a minimum. Nelson cabinets are all stainless steel interiors and the frost can be scraped off the sidewalls daily, reducing the need to completely empty the freezer for a total defrost. EXCESSIVE FROST BUILD-UP WILL PREVENT THE DIPPING CABINET FROM ACHIEVING OPTIMUM TEMPERATURES Nelson equipment must always be connected to a properly grounded electrical outlet per local electrical standards. The cabinets, per NSF guidelines, should be caulked to the floor with an NSF-grade silicone sealant or the cabinet should have casters installed.
3 ) Trouble-Shooting guide.
I. Compressor does not start. 1. Check electrical supply to insure outlet is working properly. 2. Check on/off switch located below the temperature display 3. If compressor does not start and temperature display is on, then: a. verify integrity of wires into the temperature display. b. verify the integrity of the wiring from the temperature display to the compressor. c. verify the operation of the temperature control and the temperature probe. replace and/or repair as needed 4. check to verify compressor is not defective and replace if necessary. II. Cabinet is too cold 1. Refer to the temperature-adjustment instructions and set the temperature to a higher number (warmer). Generally, it is recommended that you do not adjust more than a couple of degrees at a time. 2. If the compressor runs continuously and adjusting the temperature control to a higher (warmer) number does not cut off the compressor, then verify the integrity of the temperature control: a. verify the integrity of the wiring of the temperature control. b. verify the temperature control shuts off the compressor as required. c. verify the temperature control probe is seated adequately in the well above the compressor. The probe should be inserted into the well about 12″ or 25-30 cm. III. Cabinet is too warm. Before beginning work on a cabinet that is too warm, make sure the cabinet has been cleaned and defrosted and that the compressor air flow is not restricted in any way. 1. Refer to the temperature-adjustment instructions and set the temperature to a lower number (colder). Generally, it is recommended that you do not adjust more than 2 degrees at a time. 2. If compressor runs continuously and cabinet is too warm and temperature control is functioning properly. a. Check items 1 through 4 above under “Installation Guidelines” to make sure the environment of the cabinet location is suitable. b. Check to insure that the condenser fan motor(s) are functioning properly. Some units have 2 condenser fans and both must be working for proper operation. c. insure that the air flow over the compressor is not blocked or reduced by dirt or debris. Compressor/condenser compartment must be kept clean. If the conditions above are correct and the cabinet is still too warm, it will be necessary for a technician to check the integrity of the refrigeration system, which requires special tools and training. IV. Checking the refrigeration system: All Nelson cabinets are equipped with a low-side access valve for charging the system and diagnostics of the refrigeration system. All Nelson dipping cabinets use capillary tubes for control of the refrigeration flow. DO NOT ADD A HIGH-SIDE VALVE TO THE SYSTEM. IT CA– USES LEAKS AND BLEEDS TOO MUCH REFRIGERANT FROM THE SYSTEM. Capillary Tube systems are somewhat critically charged and the high side valve should not be used. All trouble-shooting can be determined from looking at the low side pressure reading. 1. When operating properly, one should observe a cabinet temperature of approximately 0 DEG (F) or -18 DEG (C) and a low side temperature of approximately 12 psig +/- 2psi. The suction line to the compressor should be cold but there should not be frost on the compressor housing. A slight glaze or frost on the suction line close to the compressor is ok. 2. If the low side pressure is below 10 psig, then the system is short refrigerant and should be checked for leaks. 3. Particular attention should be paid the the cap on the low-side access valve and the sealing stem of the valve, particularly if the cabinet has sat without being used for an extended period of time. 4. If the low side pressure is above 0 psig and below 10 psig, some refrigerant may have seeped out since the cabinet left the factory. It is suggested that approximately 1 oz of R404a be added to the system. After operating the unit for about 30 minutes, observe the low side pressure. If it is still below 10 psig, then add 1 more oz of R404a. 5. If the low side pressure is below 0 psig (running in a vacuum) then thoroughly check for leaks in the system. If none are found, add refrigerant to the system and observe the low side pressure. If the low side pressure does not increase with added refrigerant, (up to 12 oz. of R404a) but stays in a vacuum or near 0 psig, then most likely the capillary tube is plugged or the filer/drier is blocked. Replace the filter drier, unblock the capillary tube, then recharge the system. 6. If the low side pressure is above 12 psig, then slowly remove a small amount of refrigerant from the system until you achieve a balance of around 10-12 psig low side pressure and 0 (F) or -18 (C) temperatures in the cabinet. 7. If the low side pressure is around 10-12 psig and the suction line is warm to touch and the freezer is too warm, then the compressor may be weak and need replacement.Next BLOG POST –> My Humble Beginnings in Paradise
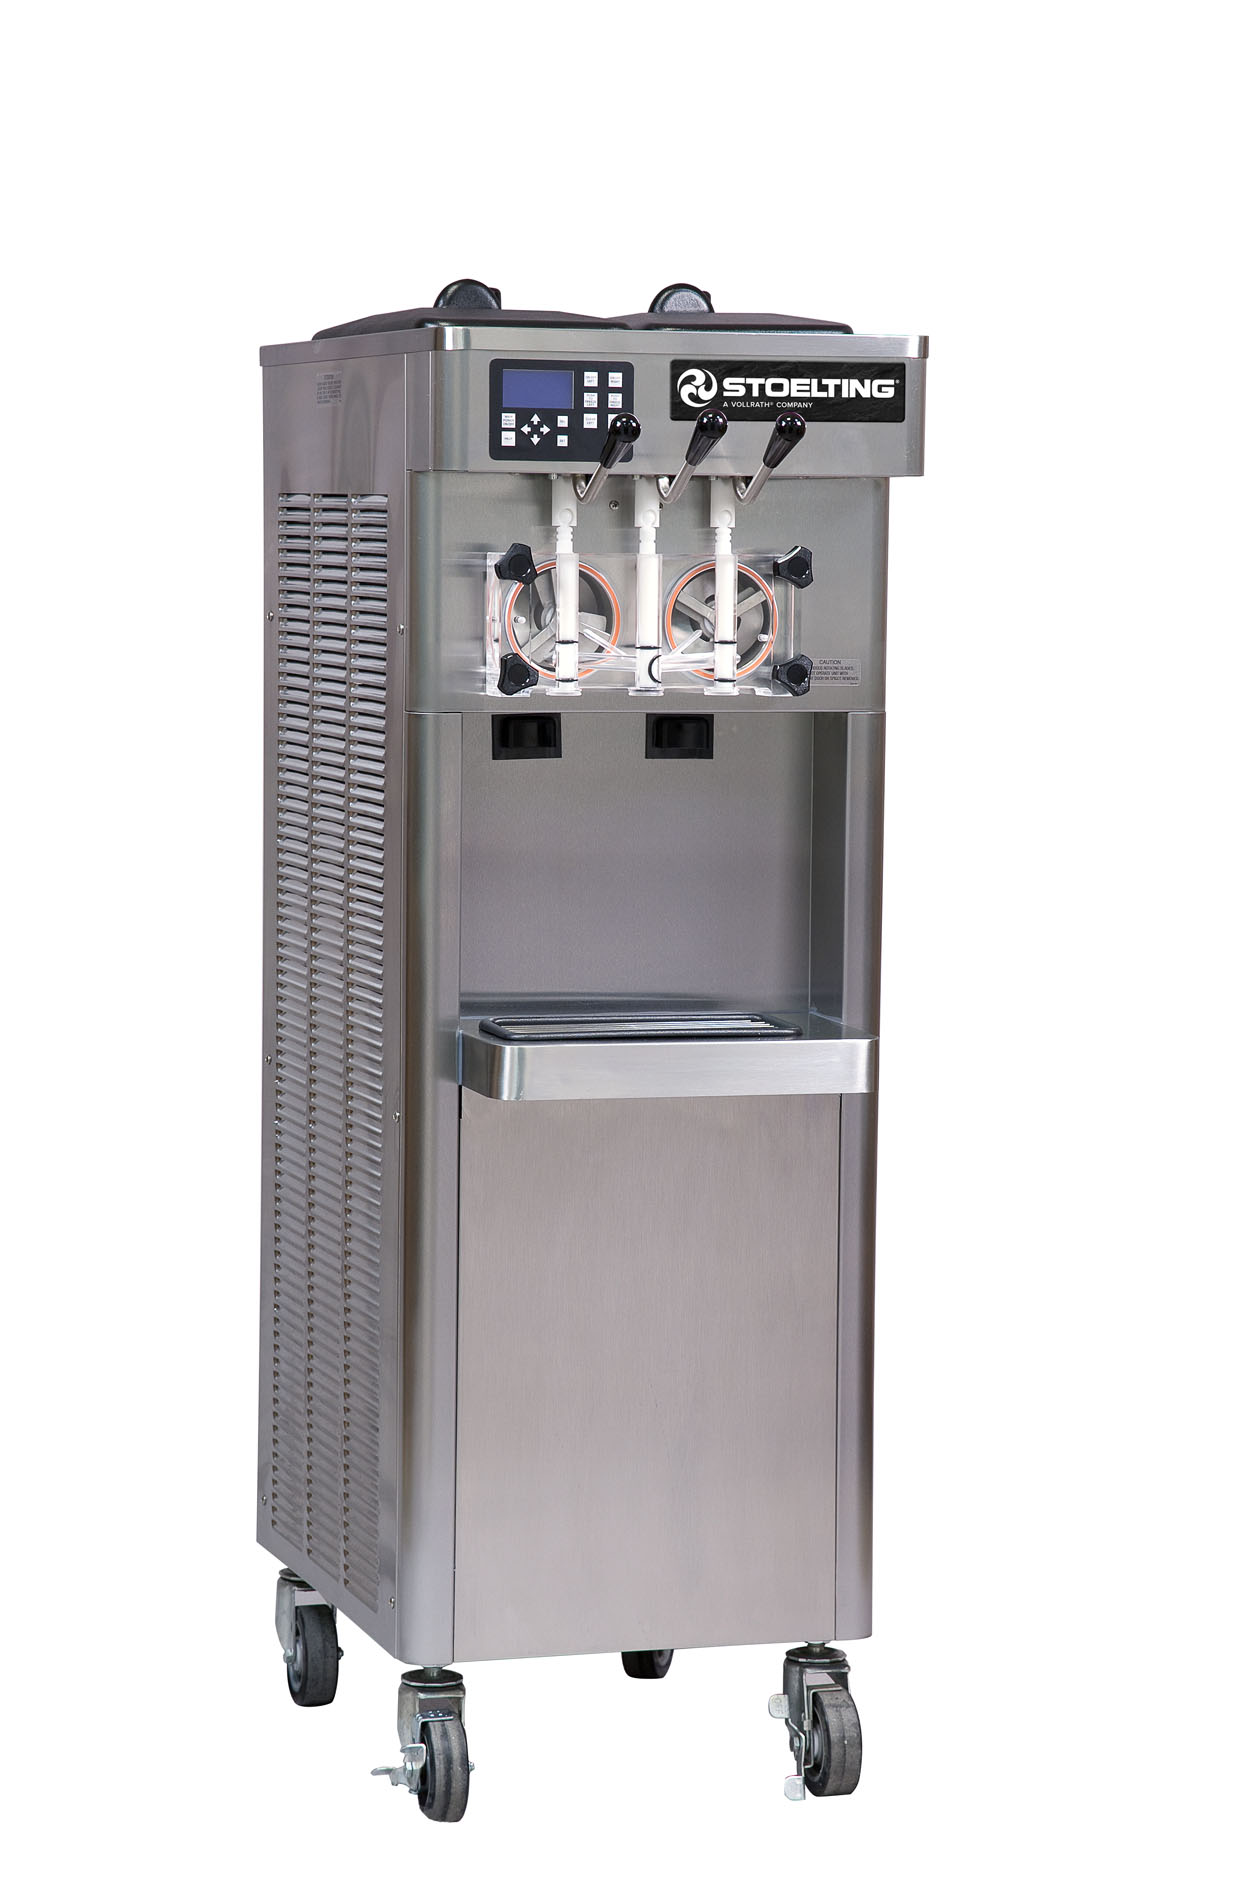
Used Stoelting F-431 – Frozen Yogurt Machine (Floor Model)
November 9th, 2018 by Neil Williams


Spec Sheet
November 4th, 2018 by Neil Williams
Ice Cream machine spec sheets – Taylor, Stoelting, Electro Freeze Note: We cannot guarantee all of these spec sheets are completely up to date.8 Stoelting F-231 Used Frozen Yogurt Machines plus assorted Equipment – Full Store – UPDATED 2018*
August 1st, 2018 by Neil Williams
 $1500 Flat Rate Shipping 48 States, Fully Insured, 100% Warranty Not sure if this is the right machine for you? Click HERE to get free machine comparison guide
Price: $21,500.00
$1500 Flat Rate Shipping 48 States, Fully Insured, 100% Warranty Not sure if this is the right machine for you? Click HERE to get free machine comparison guide
Price: $21,500.00


Used Frozen Yogurt Machines – Good or Bad Idea?
February 3rd, 2018 by Neil Williams
So… you want to add soft-serve ice cream or frozen yogurt, but starting to realize the machines aren’t cheap. Going new would be nice, but at an average cost of $15k for a two flavor machine you’re having second thoughts. Hmm…doing the math, that is a lot of soft ice cream or frozen yogurt to sell before you achieve payback on the investment. So you start thinking about used and search google. This starts to give you a headache because there are so many choices, and you can’t tell what is a good deal and what isn’t. Or who you can trust not to sell you garbage. You also need to make sure the machines are the right model for the type of store you want to open. This can be tricky. There are companies out there who rebuild older machines, but the catch is that they have old technologies. This can be a huge problem. I wouldn’t buy an older model (I draw the line at 10 years old, anything within 10 years old is still a relatively new machine in machine years – they last a long time) machine for many reasons – higher electrical requirements, no refrigerated hoppers and a host of other problems. But these guys who rebuild machines won’t be up front about how old the machines are, and if you don’t know how to figure that out, you can be taken for a ride. We all know that Frozen Yogurt machines can be expensive. In my opinion, the better road to take is to buy a good quality used machine if you are able to get one. You must make sure you buy it from a reputable dealer. Buying from individuals is taking a much bigger risk because most of them are interested in selling you the machine they own as quickly as possible. This means they won’t really be offering what you work best for your business and your customers. Individual sellers also don’t properly represent what they have, because most don’t even know the specs of their own machines! Buying from Craigslist or Ebay, is also very risky. At TurnKey Parlor, we will help walk you through the machine that makes most sense for your business AND your budget. Two things that can help: 1) Download our free soft serve machine comparison guide HERE 2) Sign-up for our Used Equipment update list below, so you’ll receive a weekly email with the latest and greatest used machines each time our used inventory is updated.
Soft Serve Machines – Electrical Things You Need To Know About
November 5th, 2017 by TurnKeyParlor.com

1. 110/115V (volts) vs. 208/230V (volts)
2. 60HZ vs 50HZ
3. Single phase vs Three phase
For more information on buying a soft serve ice cream machine, feel free to download our FREE Soft Serve Ice Cream and Frozen Yogurt Machine FREE Buying Guide.
Buying a New vs. Used Soft Serve Ice Cream Machine
August 18th, 2017 by TurnKeyParlor.com
Buying a New vs. Used Soft Serve Ice Cream Machine
 Soft Serve machines are expensive. There is no way around that fact. In my opinion, the better road to take is to buy a good quality used machine if you can get your hands on one. Just make sure you buy it from a reputable dealer. Buying from individuals is taking a bigger risk because most of them are interested in selling you the machine they own, so they aren’t necessarily offering what you work best for your business and your customers. Buying from Ebay or Craiglist, is also very risky. At TurnKey Parlor, we will help walk you through the machine that makes most sense for your business AND your budget.
To learn more about machines, get our FREE Soft Serve Machine BUYING GUIDE! E-mailed to you instantly.